In today’s digital world, insider threats are a growing concern. Whether intentional or accidental, employee actions can lead to data breaches and financial loss. Microsoft Purview Insider Risk Management offers tools to detect, manage, and reduce these risks. This guide covers deploying and managing Insider Risk Management to protect sensitive data and ensure compliance.
Microsoft Purview Insider Risk Management uses AI and machine learning to detect and respond to insider threats by analyzing activities like data transfers and policy violations. It helps prevent data leakage, IP theft, and compliance breaches.
Steps to Deploy Microsoft Purview Insider Risk Management
Deploying Microsoft Purview Insider Risk Management involves several key phases, from initial planning to ongoing administration and fine-tuning. Here’s a structured approach:
1. Planning and Preparation
- Identify Insider Risk Scenarios: Before deployment, assess your organization’s insider risk scenarios. Common scenarios include data exfiltration, IP theft, regulatory violations, and policy breaches. In this case the very first point which needs to consider is user roles .
- Some of Insider Risk Management Roles are
| Role | Description |
|---|---|
| Microsoft Entra ID Global Administrator | – Has full control over all Microsoft Entra and Microsoft Purview features, including Insider Risk Management. |
| Microsoft Entra ID Compliance Administrator | – Can manage compliance features within Microsoft Entra, including some Insider Risk Management configuration options. |
| Microsoft Purview Organization Management | – Can configure core Microsoft Purview settings, including enabling Insider Risk Management as a menu option. |
| Microsoft Purview Compliance Administrator | – Can manage compliance features within Microsoft Purview, including some Insider Risk Management configuration options. |
Stakeholders and Key Considerations
Before Implementing to larger audience we need to validate with internal stockholders to understand their nature of work .
- Planning & Workflow:
- Stakeholders: IT, Compliance, Security, HR, Legal
- Focus: Define roles, responsibilities, and actions for insider risk alerts.
- Regional Compliance:
- Stakeholders: Regional Compliance, Privacy Teams
- Focus: Align regional policies, ensure language and privacy compliance.
- Permissions & Workflow:
- Stakeholders: Security, IT Admins
- Focus: Assign roles and permissions for managing insider risk features.
- Licensing & Dependencies:
- Stakeholders: IT Admins, Security
- Focus: Check licensing, regional Azure availability, explore trials.
- Policy Templates:
- Stakeholders: Security, HR
- Focus: Configure policies, HR connectors, DLP, and Defender integration.
- Testing & Privacy:
- Stakeholders: Security, Legal
- Focus: Test with a small user group, conduct compliance reviews, enable anonymization.
Create and manage insider risk management policies
Step -1
You can open the overview page from https://purview.microsoft.com/insiderriskmgmt/overviewpage And create a new Policy.
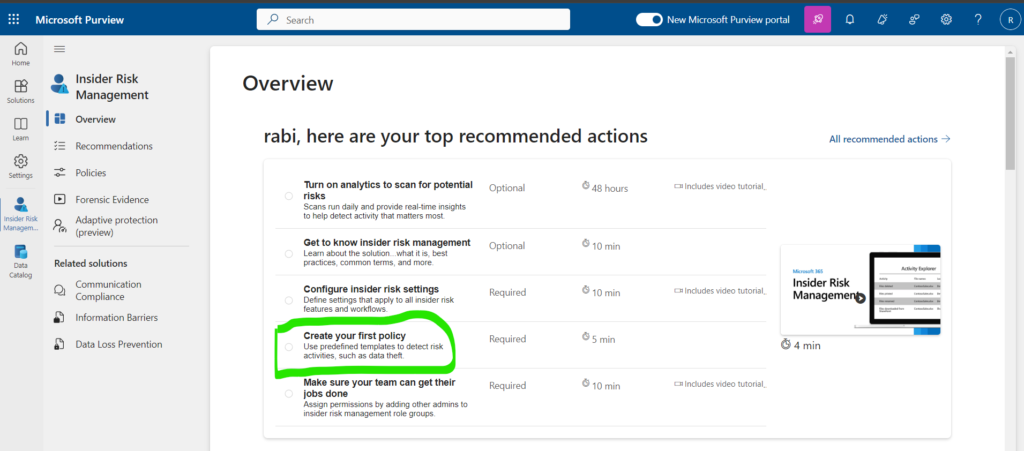
or we can chose to create it from policies option –

Today I’ll show you How to create a Data Leak policy for IRM
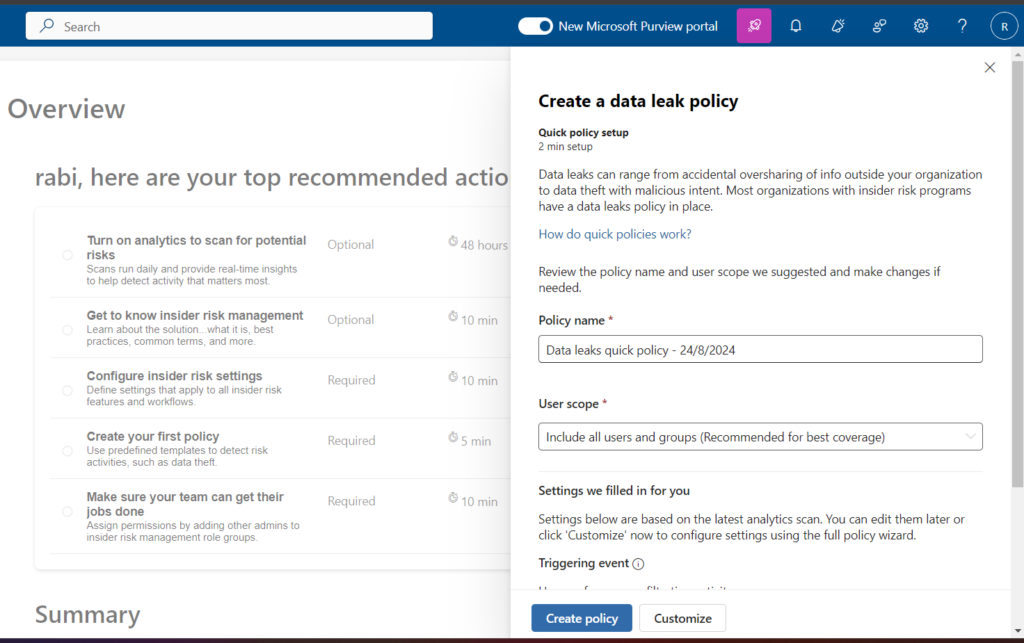
We can follow the instruction and create based on requirement.
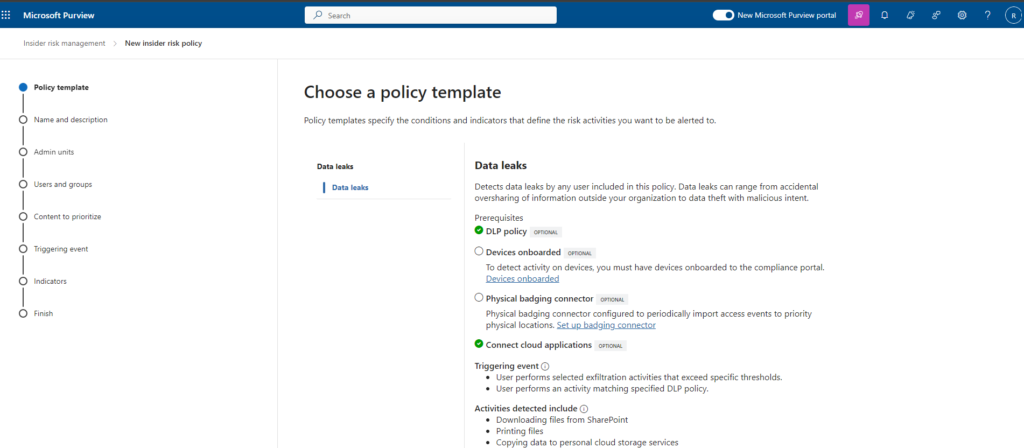
We can also chose from templet as well, some sample templet examples are –
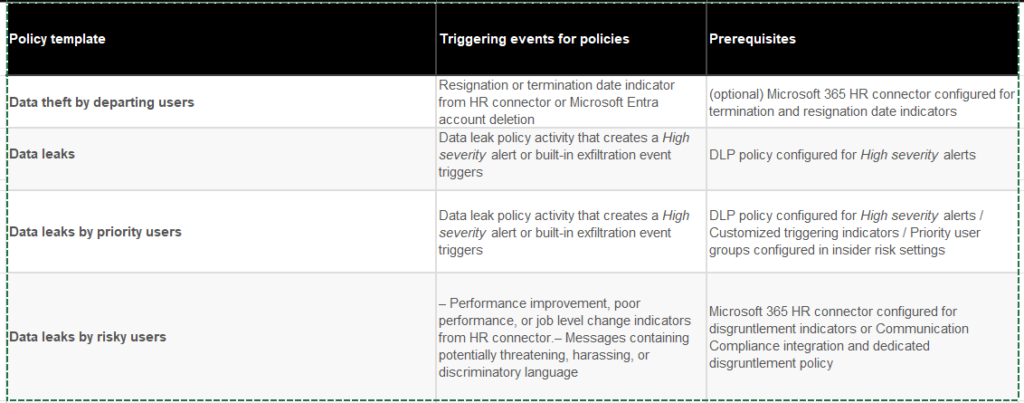
Policy Template Limits
- Purpose of Limits:
- Controls user risk scoring workload, ensuring smooth performance.
- Reason for Limits:
- Prevents system overload from excessive alerts due to misconfigurations.
- Increasing the Limit:
- Possible by contacting Microsoft support, but more users may increase alerts. Default limit allows up to 20 policies per template.
- Max User Limits:
- Check the table for user limits per policy template across all policies.
Investigate and remediate insider risk activities, alerts, and reports
Add permissions to review those Alerts

If you need to add permissions, you can choose the wheel -> Roles and scopes

Make sure you have enabled Analytics

If you want to generate those Alerts, you can start scoring for selected users manually instead of using DLP policies or other triggers.

Manage insider risk cases
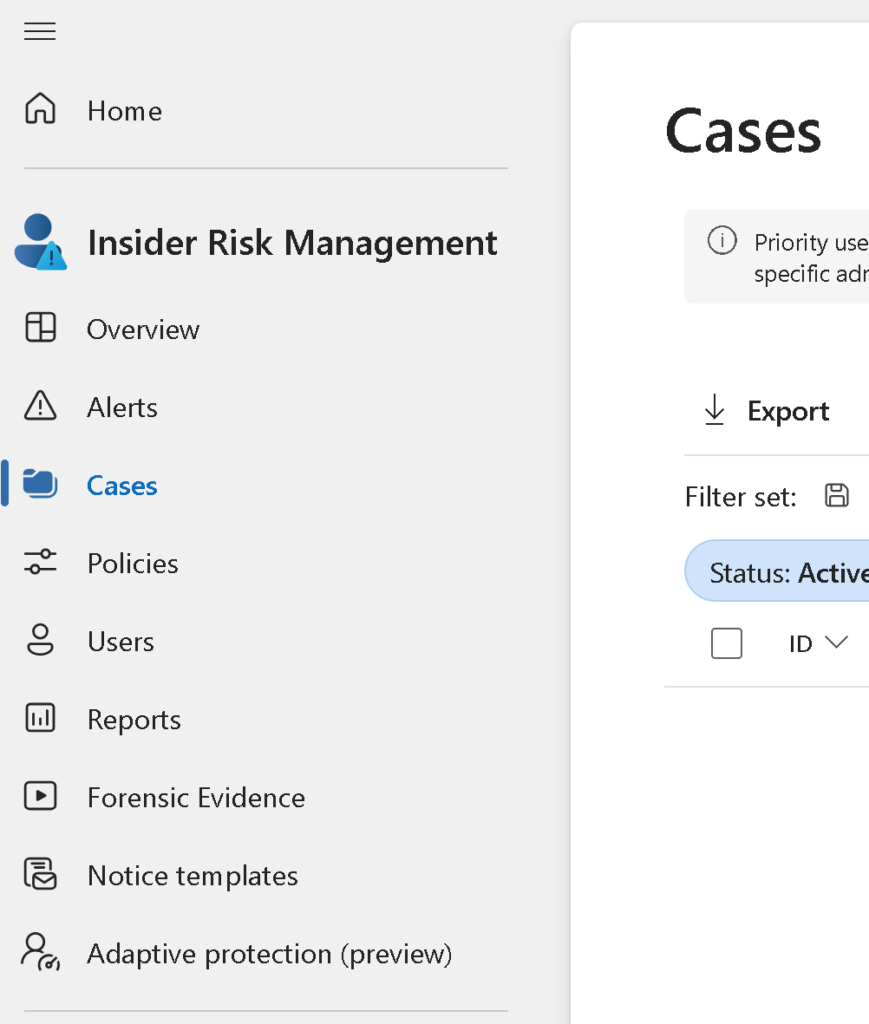

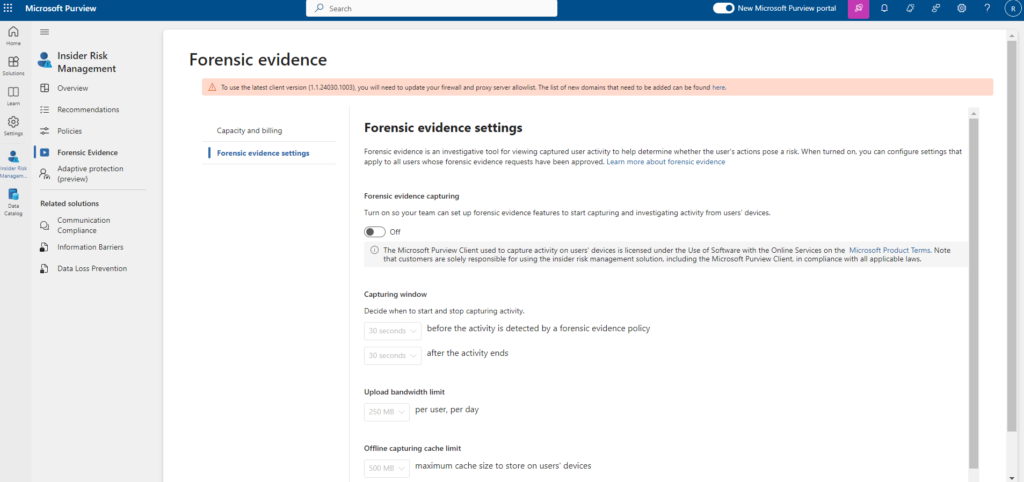
Manage forensic evidence settings
Forensic evidence settings in Insider Risk Management help enhance investigations by capturing detailed data related to risky activities. Here’s an overview:
Manage notice templates
HTML for Insider Risk Management Notices
- Creating HTML Notices: Compose notification emails with rich text formatting using HTML in the message body.
- Example HTML Structure: Provides a basic template for an HTML notification email.
- Important Note: Single quotation marks are currently required for URLs within the attribute.
Creating and Updating Notice Templates (Microsoft Purview Portal)
- Go to Insider Risk Management.
- Select Notification templates.
- Click Create notification template.
- Fill in details:
- Template name: Enter a friendly name for the template.
- Send from: Set the sender email address.
- Subject: Enter the subject line for the email.
- Message body: Enter the message content (text or HTML).
- Click Create to save the template.
Updating Notice Templates:
- Go to Insider Risk Management.
- Select Notification templates.
- Choose the template you want to edit.
- Click Edit.
- Update details as needed (refer to Create steps).
- Click Save to update the template.
Deleting Notice Templates (Microsoft Purview Portal)
- Go to Insider Risk Management.
- Select Notification templates.
- Choose the template you want to delete.
- Click the Delete icon on the toolbar.
- Confirm deletion by clicking Yes.

That’s it, let’s Secure the World!
Thanks for reading
