In this step by step, I will teach you how to setup active directory directory services with a domain using VirtualBox. The demos are based on Windows Server 2019 and Windows 10.
We’ll cover the following in this part
- Install VirtualBox and add Virtual Machines
- Install Windows Server 2019/2022 on the new Virtual Machine
- Configure Active Directory Directory Services
- Create the Domain and Configure the Domain Controller
1. Install VirtualBox and add Virtual Machines
Step 1 – Download and install VirtualBox VM. Get it free from here.
Step 2 – Download Windows Server 2019 and Windows 10 Enterprise. I’m using the 90 days trial version. I think this is enough time to get used to it.
Make sure the download the ISO files. Save them in a folder
Step 3 – Open the VirtualBox and click on the New button
Step 4 – Enter the name. Then choose the type and version as shown below.

Step 5 – Set the Memory Size to 2048 MB
Step 6 – Ensure the ‘Create a virtual hard disk now‘ is selected under disk. Click Create.
Step 7 – Choose VDI(VirtualBox Disk Image) in the ‘Hard disk file type’ and also select ‘Dynamically allocated’
Step 8 – Set the Hard disk size to 30GB
2. Install Windows Server 2019/2022 on the new Virtual Machine
Now we would use the ISO file we downloaded to install Windows Server 2019 in the new virtual machine we created. Follow the steps
Step 1 – Start the new Virtual Machine (Right-click > Start)
Step 2 – Select the ISO file you downloaded and click Start

Step 3 – Follow the onscreen prompt to install windows. Ensure to choose ‘Windows Server 2019/2022 Standard Evaluation(Desktop Experience)”
Also ensure to choose Custom Install from the next screen. Then wait for the installation to complete
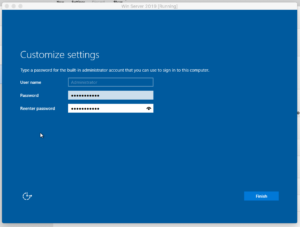
Step 4 – Choose an Admin password in the Customize setting window as shown. Click next to complete the installation
Step 5 – Now you can log on to Windows. The Server Manager Dashboard opens up as shown below.
Step 6 – First install ‘Virtual Box Guest Additions’. This would allow you to set the VM screen to full screen. See the video.

3. Configure the Active Directory Directory Services(AD DS)
Now we would set up this computer as a domain controller. We do this by installing the AD DS role to the server.
Step 1 – Click on Add Role and Features in the Dashboard. This opens the Add Roles and Features Wizard.

Step 2 – Click on Next > Next until you have a list of Features
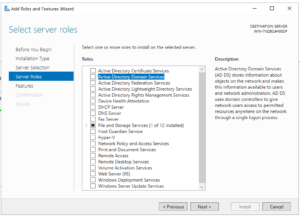
Step 3 – In the list, check Active Directory Directory Services as shown below
Step 4 – Then complete the installation by clicking on Next > Next until the installation completes.
4. Create a Domain and Configure the Domain Controller
To complete the process of creating a domain, we need to promote the sever to a domain controller. Follow the steps below to do that.
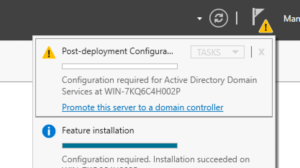
Step 1 – Click on the yellow triangle at the upper right and click ‘Promote this server to domain controller’. The ‘Active Directory Domain Services Configuration Wizard’ opens up as shown below
Step 2 – Click on ‘Add a new forest’ and enter a name for the domain and add .local suffix. For this example, I’m using KTG.local
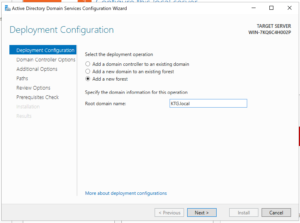
Step 3 – Click on next and then enter a password. Click Next
Don’t worry about DNS because it would choose it’s own
Step 4 – Allow the default Netbios domain name which is the same same but without .local suffix.
Click on Next to complete the installation. Allow the system to restart.
Step 5 – You can now login with KTG\Adminstrator. Enter the password you set.
At this point, you have created a domain as well as a domain controller. Congrats!
But we are not done yet. We’ll proceed to Part 2 where we would then create user, set up the network and join computers to the domain.
